Friday, June 11, 2010

The Cream of the Crop Shimmering Like a Vivid Blue Sapphire....The Royal Blue Potato~!

Aside from the greens, urge your peers to add-on their blues!


All Blue potatoes are probably the most direct descendant of potatoes found almost 10,000 years ago high in the Peruvian Andes mountains, and likely smuggled into the United States from Peru in a diplomatic pouch around 1957, delivered to Sylvan Ambrose Hart who cultivated them. The blue potato is also proving a hit across Ireland since it was recently introduced to the market by a Dublin family which has been growing vegetables for 200 years.

With a genetic flaw in these gems, a mutation in the P locus of their chromosome sequence, this results in giving these humble spuds a natural plus, the production of an antioxidant anthocyanin, a flavonoid 3',5'-hydroxylase.

Apart from the potential health benefits, it is its nostalgic appearance, a deep nutty flavour, and a heavenly texture that captured my attention. As the starch swells in the vigourous heat of dry sauna, each granule explodes into a creaminess that could almost mask its heavily fat laden mashed cousins. The salty grains further enhance the natural nuttiness of these gems..


~ Simple Roasted Royal Blue Potatoes ~


serves 8

3 lb Blue Potatoes, washed and quartered, and thoroughly dried.
~1/3 cup Olive oil, enough to coat all potato wedges
3 Tbs fresh herbs, coarsely chopped (mixture of your favourites! I used rosemary and thyme)
4 clove garlic, minced

kosher salt
freshly cracked black pepper

1. Preheat your oven to 400 degrees. Line a roasting pan with parchment paper or aluminum foil.
2. Place the quartered potatoes on the roasting pan. Drizzle the oil and chopped herbs over the quartered potatoes, and shake the pan until the potatoes are evenly coated. Do not add the minced garlic at this stage.
3. Roast the potatoes uncovered for 20 minutes. Shake the pan at the 20-minute mark maneuver the potatoes, then roast for another 15-20 minutes.
4. Check the potatoes, and when the potatoes begin to colour, add the minced garlic, shake the pan again to evenly coat the potatoes in garlic, and roast for another 10 minutes, or until golden and crispy.

For an extra indulgence, tasty bits of crispy bacon wouldn't hurt!

Bon Appetit~!

Sunday, April 18, 2010

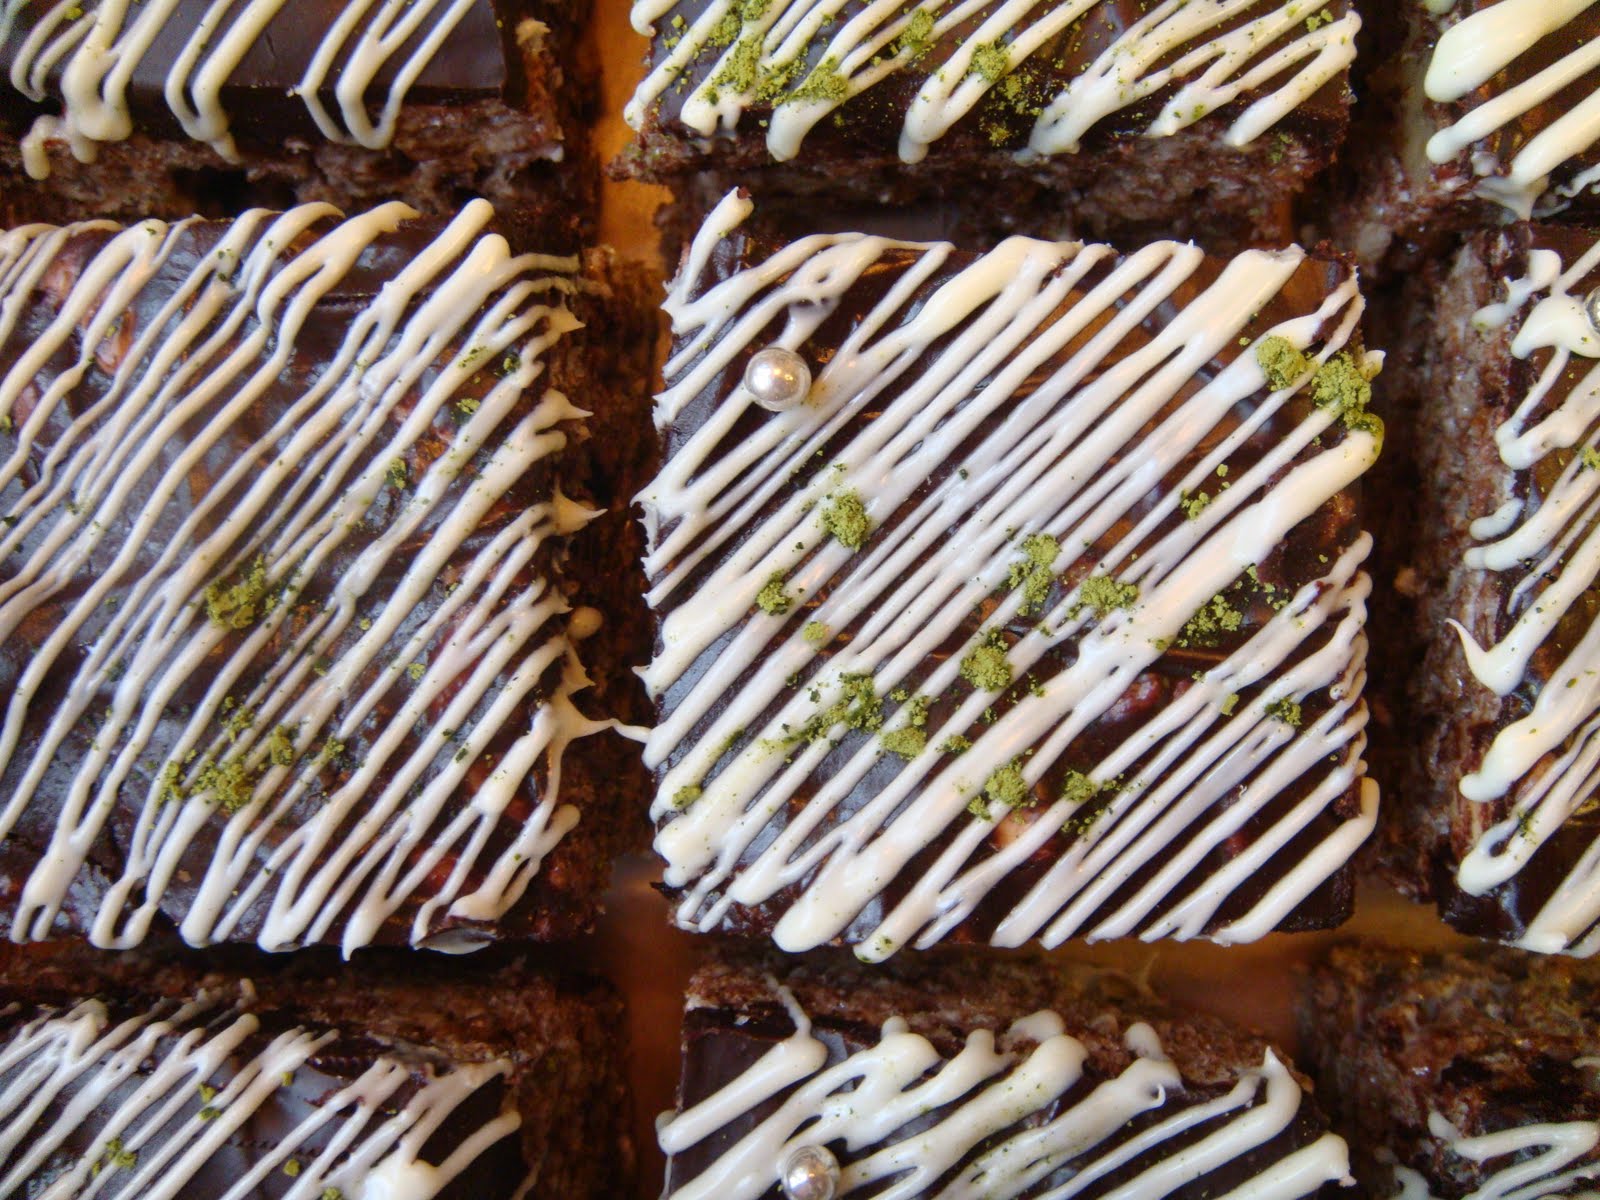
Glam-up the traditional Rice Krispie Treat with Earl Grey for a Fetus Fiesta~!

a.k.a., a gender-friendly Baby Shower that just won the Best Title Award!


As the time runs short, I allowed my favourite flavour and aroma to guide through a mysterious venture, giving me the inspiration to dress up an ordinary treat in a savoury couture.


~ Earl Grey Rice Krispie Treat ~


3 tbs Unsalted butter
10 oz package Miniture marshmallow
6 cups Cocoa Rice Krispie
Earl Grey Ganache
- 4 Earl Grey tea bags
- 10 oz Chocolate couverture (60-71% cacao), chopped finely and place in a bowl
- 1 cup Heavy Cream
Melted white chocolate for final touches, French silver dragees optional


1. In large saucepan melt butter over low heat. Add marshmallows and stir until completely melted. Remove from heat.

2. Stir in the cereal until well coated.

3. Using buttered spatula or wax paper evenly press mixture into buttered 13 x 9 x 2-inch pan. Allow the mixture to cool.

4. Pour Earl Grey Ganache (recipe below) and spread evenly over the treat. Allow it to solidify prior cutting into desired sizes and shapes.

5. Drizzle the pieces with white chocolate.


Earl Grey Ganache:

1. In a small sauce pan, bring the heavy cream to a slow simmer.

2. Add the Earl Grey tea bags and allow them to seep in the cream for 5 minutes.

3. Remove the tea bags and bring the heavy cream back to a boil.

4. Pour the boiled cream over the chopped chocolate, allow the chocolate to melt undisturbed for 1 minute.

5. Stir the cream and chocolate mixture gently until chocolate has completely incorporated into the cream.


For further information on Earl Grey tea, please check out my other post:
"Earl Grey....from an obsession to a devotion...."


Bon Appetit~!

Friday, February 26, 2010

Delicacies for Chinese New Year Round Three - The Overloaded Taro Cake~!

This recipe is dedicated to my family, and to anyone who is as obsessed with this purple root as we are! Just make sure you do not overload with this fragrant yet zesty tasting taro, which turns the cake into a more croquet like consistency, but still mouthwatering.


For those who might be interested in reading further on this amazing root, please check out my previous post:
"Macaron de la divinité captures the essence of this mulberry purple coloured root....~ le Macaron aux Taro~
Taro flavoured macaron filled with coconut white chocolate ganache"


~ Chinese Taro Cake - 芋頭糕~

Ingredients:

- 2 lb Taro root - about 2 medium size, peeled and cut into 1/2 cubes
- 500 g plain rice flour (粘米粉) - not glutinous rice flour
- 4 long links Chinese sausages (臘腸) - cut into 1/4 inch cubes
- 200g Chinese cured bacon ((臘肉) - cut into 1/4 inch cubes
- 4 dried scallops, 3 tbs dried shrimps, 6 dried shiitake mushrooms
(place all 3 above ingredients in a bowl and soak overnight with cold water just
enough to cover all the ingredients)
- 750mL water
- 3 tbs chicken bouillon powder
- 4 tsp white pepper
- 2 tsp five spiced powder
- 3 tsp salt
- 4 tsp sugar
- a bunch of coriander - coarsely chopped


1. Squeeze out the soaking liquid from the hydrated dried scallops, dried mushrooms and shrimps, and finely chop these ingredients. Reserve soaking liquid.
2. Steam the cubed taro in a even layer for 20 minutes or until all pieces have turned slightly translucent.
3. Heat up a wok or a large frying pan over medium high heat, add in the Chinese sausages and cured bacon, stir-fry for a 5-8 minutes or until most of the oil has rendered out from the cured meats.
4. Gradually add the finely chopped mushrooms, scallops and shrimps. Keep stir frying them for about 5 minutes.
5. Stir in all the seasonings and allow them to warm in the mixture for a minute. Remove from heat.


6. In a large baking pan (ideal size would be a 16 inches in diameter and 4 inches deep, or 2 9-inch cake pan would also be fine), pour in the rice flour and gradually stir in the soaking liquid and water. Mix until completely incorporated.
7. Stir in the solid ingredients from the wok and mix thoroughly, and gently fold in the steamed taro cubes.
8. Steam the cake in a large wok with consistent yet vigourous steam for an hour and a half.


9. When it is cooked, remove from heat and sprinkle the chopped coriander on top as garnish.
10. The cake can be served immediately as the steamed version,


11. For the pan-fried version, allow the cake to cool and refrigerate overnight. Cut the cake into slices and pan-fry until golden brown and crispy on each side. Serve with XO sauce or chili sauce if preferred.


Bon Appetit~!

Thursday, February 18, 2010

Celebrate a decade of absence with my grandmother's famous Chinese Daikon Cake!

I often wondered what Chinese New Year is like for visitors in Hong Kong. This festival is a time for families to reunite, not only to welcome in the new lunar year, but also to feast together with home-prepared meals. Meanwhile, as the expat population flies to places like Bali or Thailand for the extended national holiday, the trains to the rural New Territories would be overflowing, while the bar-filled Lan Kwai would be partly deserted.


To celebrate the 10-year anniversary of my absence from Hong Kong during this festivities-filled celebration, I subconsciously trickle passed the fellow patrons of a local Chinese grocer, fluidly gathered all the necessary ingredients, for the making of my favourite Chinese Daikon Cake (蘿蔔糕).

Chinese Daikon Cake or Lo Pak Gao, is my all time favorite, you can find this all year round in Dim Sum restaurants. Yet, this speciality dish, similar to the Chinese New Year cake, is one that almost no commercial versions would be in competition with ones made at home, filled with joy, love, and hours of grating, chopping, steaming, and enduring the stinging sensation as the daikon juice attacks the skin surrounds your fingers....thanks dear Granny, Mum and Dad for all the decadent daikon cakes I have devoured in the past!


~ Chinese Daikon Cake ~

Ingredients:

- 6 lb Chinese daikon - about 3 large ones
- 500 g plain rice flour (粘米粉) - not glutinous rice flour
- 4 long links Chinese sausages (臘腸) - cut into 1/4 inch cubes
- 200g Chinese cured bacon ((臘肉) - cut into 1/4 inch cubes
- 4 dried scallops, 3 tbs dried shrimps, 6 dried shiitake mushrooms
(place all 3 above ingredients in a bowl and soak overnight with cold water just
enough to cover all the ingredients)
- 2 tbs chicken bouillon powder
- 2 tsp white pepper
- 1 tsp five spiced powder
- 2 tsp salt
- 3 tsp sugar
- a bunch of coriander - coarsely chopped


1. Squeeze out the soaking liquid from the hydrated dried scallops, dried mushrooms and shrimps, and finely chop these ingredients. Reserve soaking liquid.


2. Coarsely grate the Chinese daikon and place the grated daikon in a strainer over a large bowl. Squeeze out as much of the liquid from the daikon, but reserve the liquid.


3. Heat up a wok or a large frying pan over medium high heat, add in the Chinese sausages and cured bacon, stir-fry for a 5-8 minutes or until most of the oil has rendered out from the cured meats.


4. Gradually add the finely chopped mushrooms, scallops and shrimps. Keep stir frying them for about 5 minutes.
5. Stir in all the seasonings and allow them to warm in the mixture for a minute before adding the grated daikon. Stir-fry all the ingredients for about 2 minutes and remove from heat
6. In a large baking pan (ideal size would be a 16 inches in diameter and 4 inches deep, or 2 9-inch cake pan would also be fine), pour in the rice flour and gradually stir in the reserved daikon juice and soaking liquid. Mix until smooth.
7. Stir in the solid ingredients from the wok and mix thoroughly.


8. Steam the cake in a large wok with consistent yet vigourous steam for an hour and a half.


9. When it is cooked, remove from heat and sprinkle the chopped coriander on top as garnish.
10. The cake can be served immediately as the steamed version,
11. For the pan-fried version, allow the cake to cool and refrigerate overnight. Cut the cake into slices and pan-fry until golden brown and crispy on each side. Serve with XO sauce or chili sauce if preferred.
12. It can also be transformed into the famed dish in HK XO sauce stir-fried daikon cake (XO 醬炒蘿蔔糕). Cut a portion of the cake in small cubes and stir fry with finely chopped garlic, bean sprouts, sliced red and green bell peppers, eggs, and XO sauce.

Bon Appetit~!

LinkWithin

Related Posts Plugin for WordPress, Blogger...